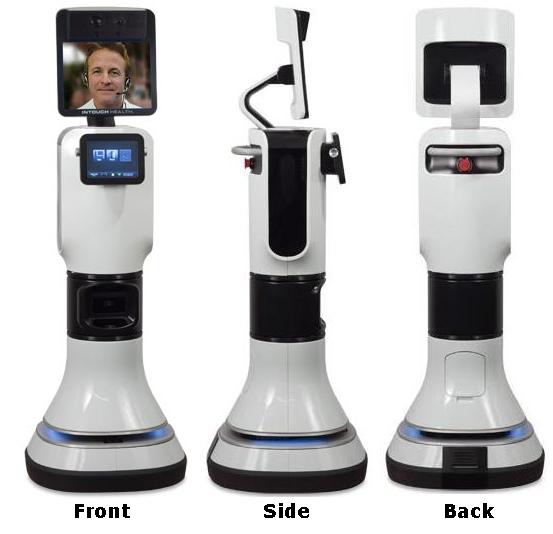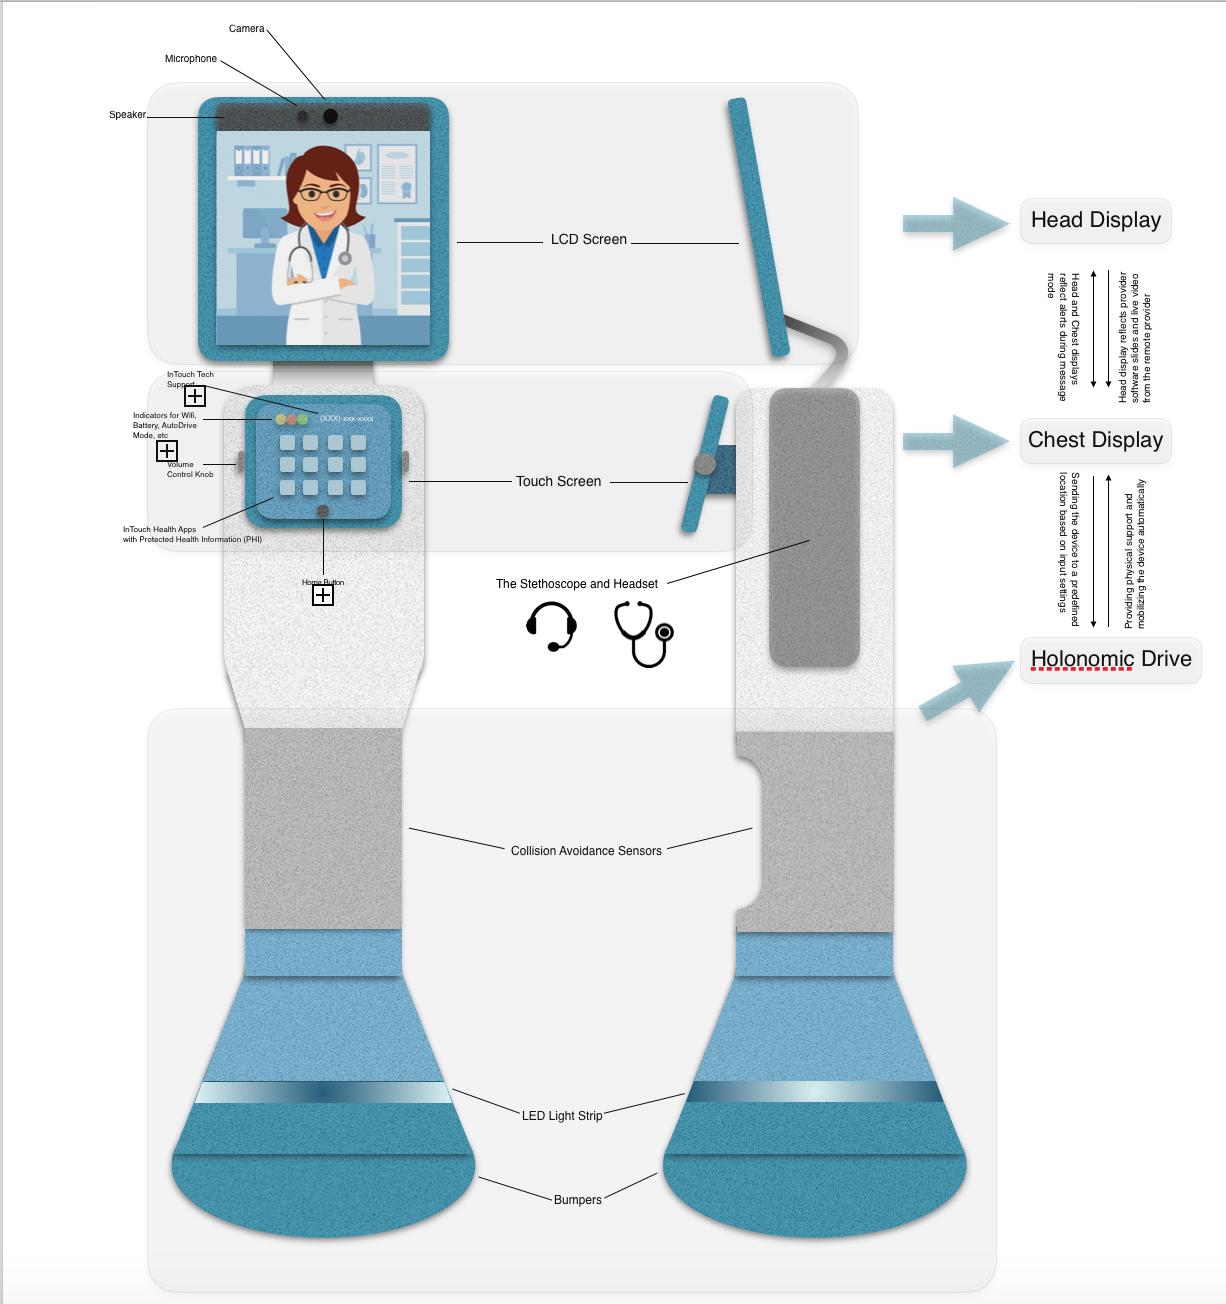
Our Architecture section will explain how the various parts of the iRobot vita are assembled. From top to bottom, there is the Head Display, featuring the screen through which the patients and doctors communicate; the Chest Display, which has the panel where medical information is displayed and transferred; and the Holonomic Drive, which gives the iRobot Vita its structure, support and mobility.
Head Display:
- Screen – Based off of the LCD (liquid-crystal display) design, this screen acts as a window into the hospital. It allows for exchanges between patients and physicians, informative videos to be played and safe monitoring of the hospital.
- Microphone – There is a built-in microphone above the screen which records sounds and conversation, then transmits them along with the accompanying video.
- Camera – Located next to microphone, above the screen, the camera films the material that then appears on the screen.
- Speaker – As the video, live or recorded, plays, the speakers allow the listener to hear what they are watching. The Volume Knobs on the robot’s chest can control how loud or soft the audio coming out of the speakers is.
- Stand – The Head Display is attached to the “chest” of the iRobot VITA by the metal stand, granting the former structure and support.
Chest Display:
During active connection to Provider Access Software, the video from the Provider Access Software will be displayed on the Vita Head Display and the name of the remote person in the session is shown on the Chest Display. The Vita Touch-Screen Chest Display provides in-session information and local control of the Vita. When Vita is powered on, the user can tap the Chest Display to display the robot serial number, battery charge, Wi-Fi signal strength, Technical Support telephone number, and the on screen buttons.
- Settings – Tap the Settings button to select network connections or access detailed information concerning Vita.
- Home – The Home button takes you to the Home screen from any other screen reflected on the chest display
- Apps – The Apps feature allows the user to view preloaded slide-shows on the Vita Head Display in addition to InTouch proprietary apps.
- AutoDRIVE – Tap the AutoDRIVE button to send the Vita to any learned location. The Chest Display shows options to start and stop the autonomous drive. The pre-saved multi-map feature is also accessible via the Chest Display touchscreen.
Holonmic Drive:
A key feature of the RP-Vita is its freedom of movement to support the physician’s telepresence in the indoor hospital environment. The application works mainly through the AutoDRIVE command that is available on the provider access software, in such a way that the physician (remote user) simply commands a destination and the robot would automatically navigate to the specified location, thus completely eliminating the need for the user to “drive” the robot to places. While the robot is on its “mission” to reach the specified location, its LED lights blink a particular color, which in this case is teal, to indicate other agents in the environment of its intention of motion.
The RP-Vita comes with a head and a body. Essentially, the body refers to the tower portion of the robot which consists of a torso and a base. The torso is made up of a panning sensor module which is made up of three 3D imagers and three sonar detectors that rotates to detect to detect obstructions upto 98 feet within a 270 degree range. These two FDA class 1 technologies aid the Obstacle Detection and Obstacle Avoidance sensor of the system (ODOA) to tackle the dynamics of the changing environment. The base also contains a LIDAR gap to map the location and to navigate longer distances.The base contains a holonomic drive system that gives the main locomotive and mobility support to the robot.
